How to create and manage menu items
Last updated August 4, 2025
The Items tab of your Hotplate portal is where you’ll create and edit all the goodies that you offer on your menu. Managing your Items here makes it easy to quickly build menus later when you put together an event.
Creating an Item
- Click into the Items tab at the top of your Hotplate portal, then click the button that says Create in the top right corner.
- Start by adding a photo of the item, and the corresponding info like it’s name, description, and base price. Your Base Price is the cost of the item without any modifications or options added (we’ll show you how to add those next).


Offering options for flavors, quantities, or modifications
We want to start off by saying while you can offer options on your menu items, too many options might make it harder for customers to figure out what they want! We recommend limiting your options.
If you do have options for your menu items, you can add an option group by clicking this button at the bottom of the screen. Chefs usually add option groups to allow customers to choose different flavors, quantities, or make a modification to the item. You can choose from Modifier or Variation option groups.
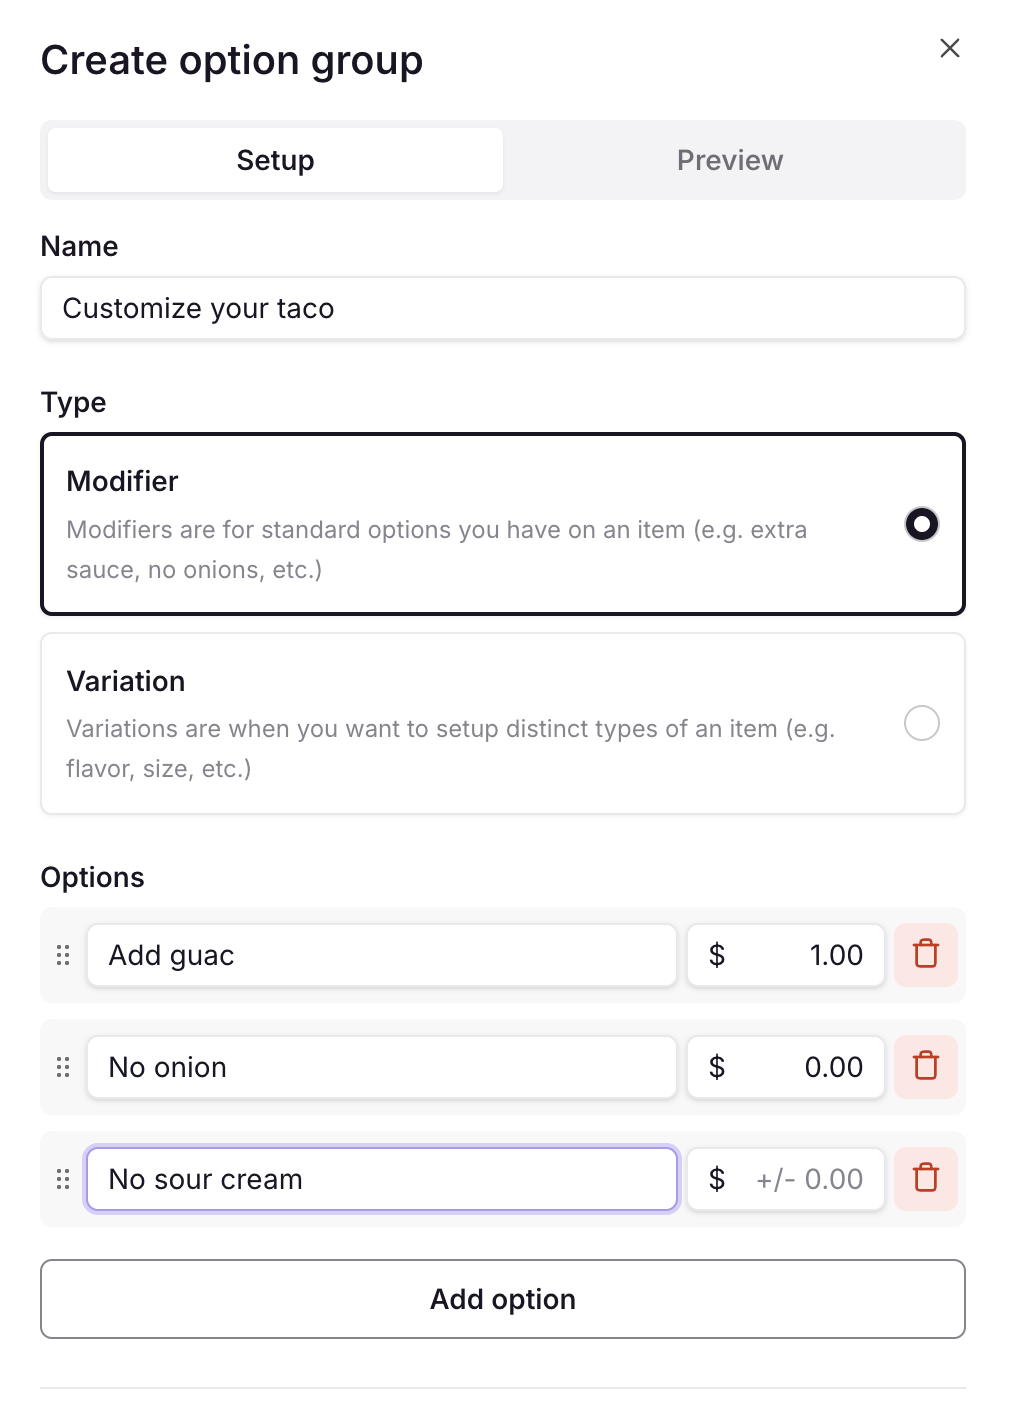
Modifiers are changes a customer can make to an item. Think about using this to allow customers to add or take a way things. You can choose to charge or not for these modifications. In our example below, customers can customize their taco and by adding or taking away ingredients. When you select the Modifier option, the changes a customer selects will appear in line on the order ticket (see below).

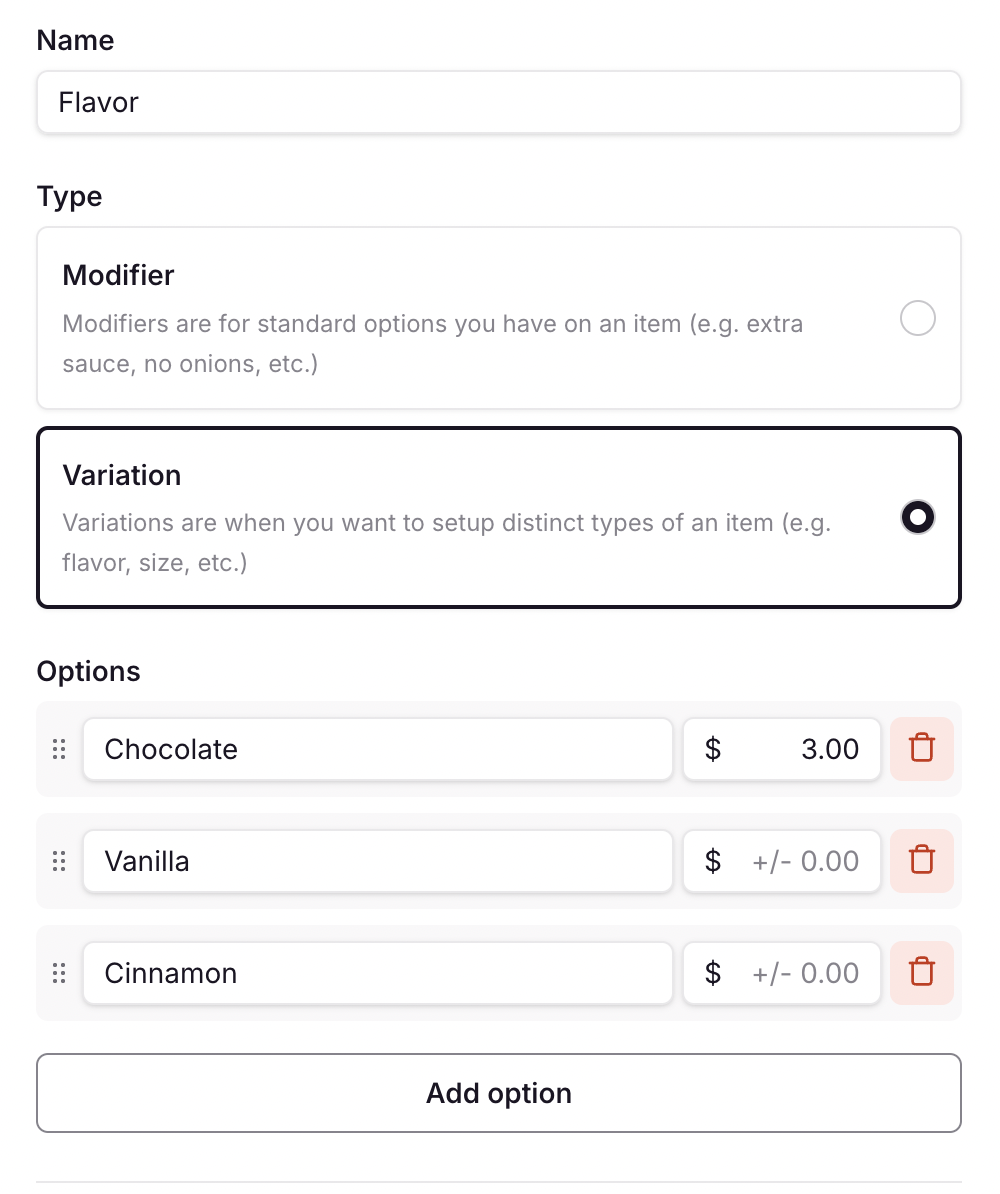
Variations on the other hand allow you to split out a specific item into distinct groups. Chefs usually use this feature to offer different flavors or quantities of an item. When you add a Variation option group, the different options will be split as different items your prep tab (see below). You can also choose to charge customers extra for any specific option. This extra fee will be added to the base price you originally defined.

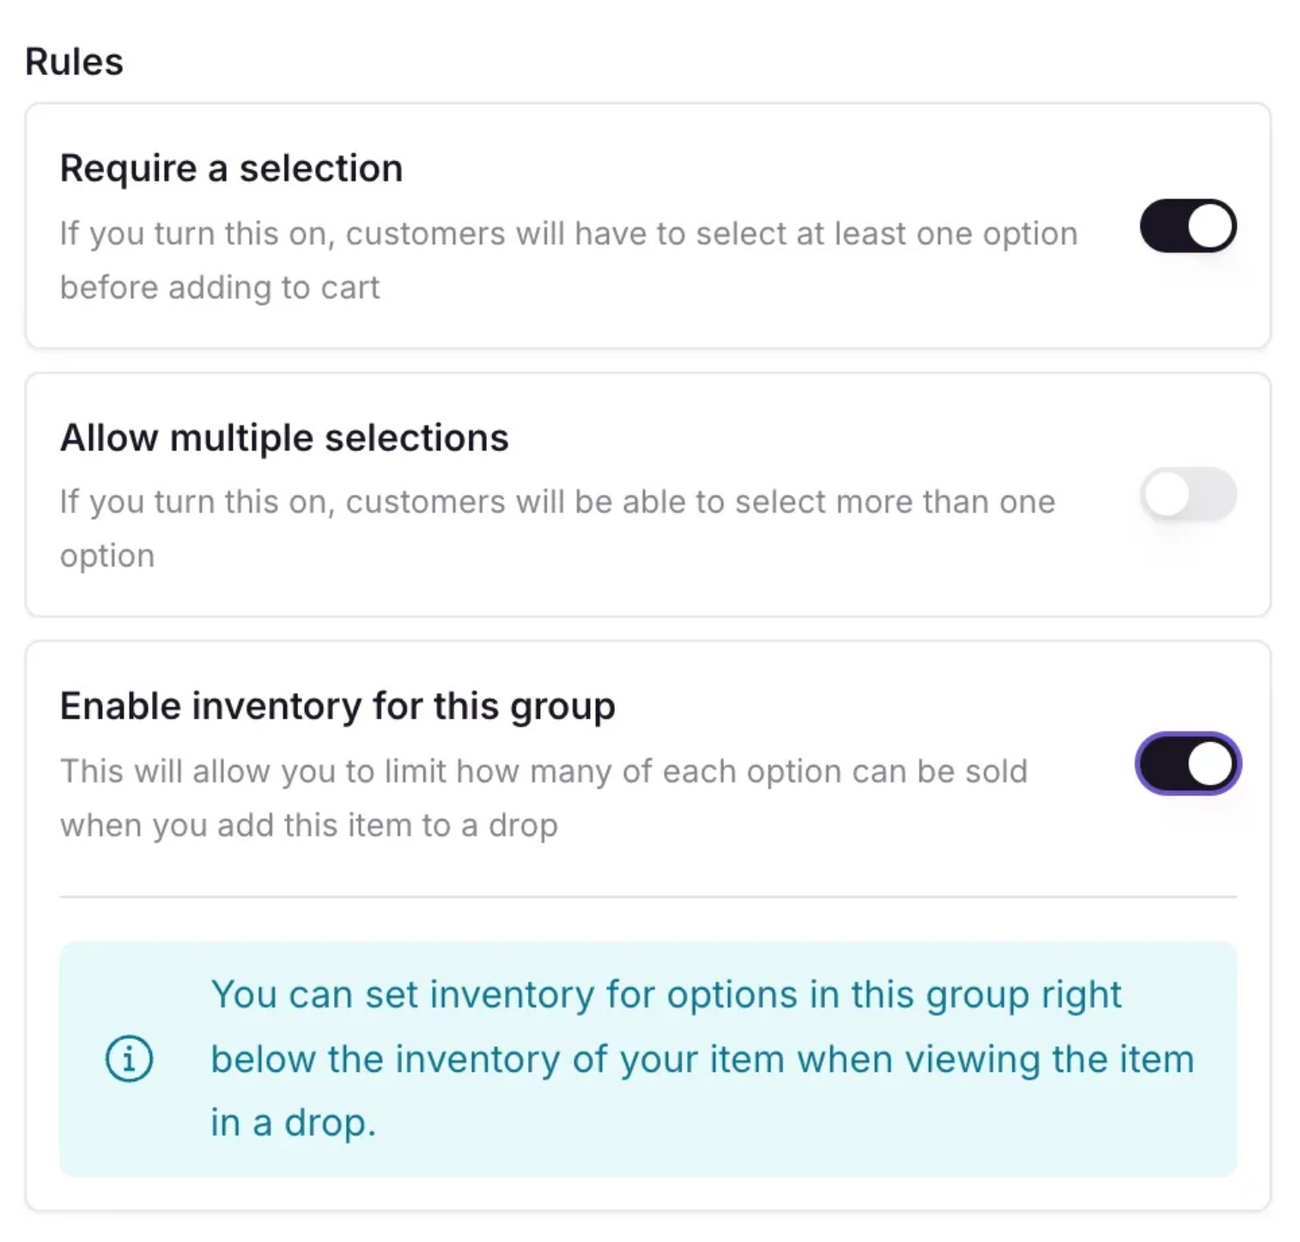
When creating an option group, be sure to also turn on any rules that might apply.
- Require a selection - means customers will have to pick one of your options before adding the item to cart. Chefs usually do this for something like a flavor choice.
- Allowing multiple selections - means that your customer can pick multiple options in the group. (Let's say if you want them to select multiple toppings.)
- Enable inventory for this group - means that when you add this item to an Event menu later, you will be able to set inventory limits on each variation.

Additional options
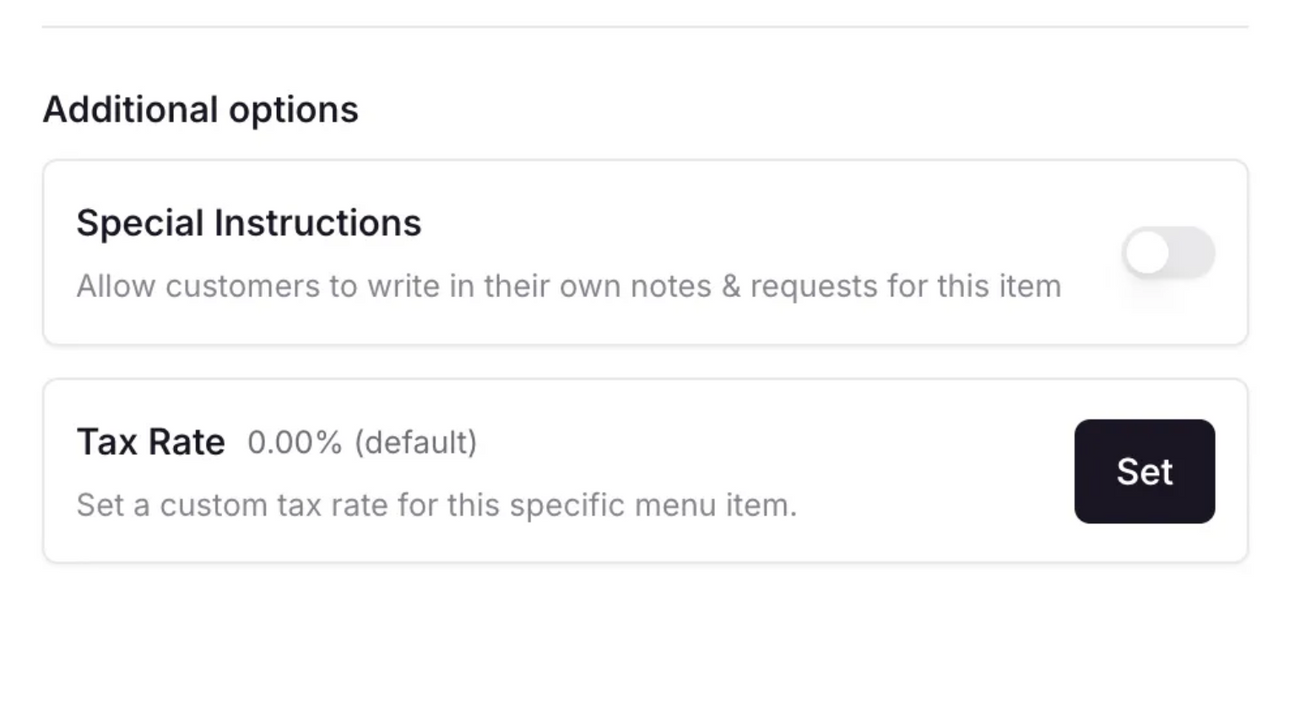
You’ll see a few extra settings at the bottom of the screen when creating an item.
Special instructions - If you turn this on, customers will be able to write in a note or request for the item. For example, if you’re selling personalized cakes, this can be where you ask customers to enter the text they want piped onto the cake.
Tax Rate - This is optional, but you can set a custom tax rate that will apply only to this specific item. You may choose to do this if you’re planning to offer an item only in a specific county and want to apply their special tax rate. If you don’t set this, then your default tax rate will apply. (More on tax rates here !)

Managing an existing Item
Making changes to any of the information or options you’ve created for an item is easy! Just navigate to the Items tab, select the item, and you’ll be able to make any changes. Be sure to hit Save changes when you’re done!


